theAuth Multi-Tenant SaaS Auth: Orgs, RBAC, SSO, SCIM
theAuth is open-source auth for AI agents and humans. Star the repo on GitHub · Read the docs · Run...
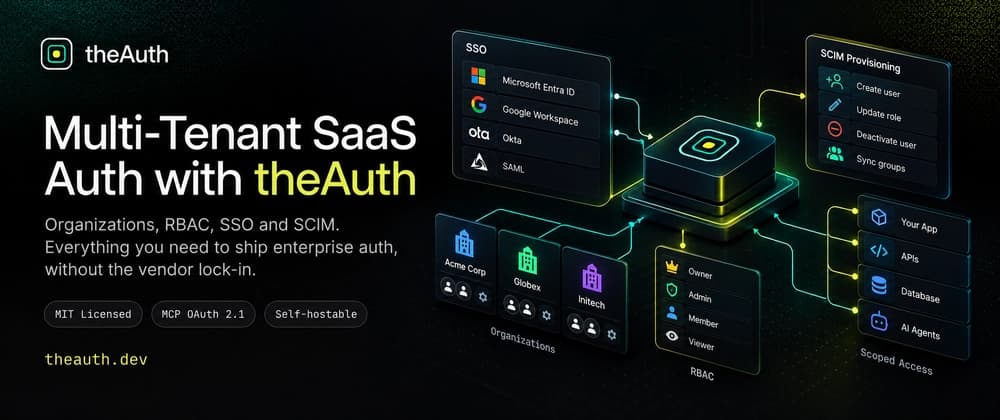
theAuth is open-source auth for AI agents and humans. Star the repo on GitHub · Read the docs · Run the quickstart · theauth.dev
The first enterprise deal usually arrives with one sentence in an email. "Can our employees sign in with Okta, and can you turn them off when they leave?"
I have watched teams answer that sentence with a six-week detour. They bolt a company_id column onto every table, hand-roll invite emails, and then discover that SAML has opinions. This guide walks the whole path in one sitting: organizations, roles, a resource hierarchy, SSO, and SCIM provisioning.
I use theAuth for the code, an open-source TypeScript auth library (@glinr/theauth). I will also tell you where it stops and where your own code has to take over. Some of those gaps matter more than the features.
This is guide 3 of 8 in the theAuth guides. It stands on its own, so you can start right here. It builds on a working login (guide 1) and does not need the other guides.
| Guide | Title | Read it when |
|---|---|---|
| 1 | Add login to an existing Next.js app | You have an app with no auth yet |
| 2 | Passwordless login: passkeys, links, OTP | You want to drop passwords or add 2FA |
| 3 | Multi-tenant SaaS auth: orgs, RBAC, SSO, SCIM (this guide) | You sell to teams and companies |
| 4 | Migrate from Auth0 or Clerk | You already run another provider |
| 5 | Give every AI agent its own identity | You run AI agents and need to start somewhere |
| 6 | Cap agent spend and require human approval | Your agents spend money or act on risky things |
| 7 | Secure an MCP server for production | You expose tools over MCP |
| 8 | Build an audit trail for AI agent actions | Someone will ask what your agents did |
Building for people? Start at guide 1. Building for AI agents? Start at guide 5. Every guide links to the docs page for each concept it touches.
TL;DR#
| Layer | What it does | theAuth piece | Docs |
|---|---|---|---|
| Tenancy | Groups users into a company | org module |
Organizations |
| Roles | Answers "can this member do X in this org" | built-in and custom org roles | Organizations |
| Resource access | Answers "can this user see this one document" | ReBAC engine | ReBAC |
| Enterprise login | SAML 2.0 or OIDC, routed by email domain | sso module |
SSO |
| Lifecycle | Create and deactivate users from the IdP | scim plugin |
SCIM |
You will end with one createTheAuth call that wires all five layers, plus a short list of checks you must add yourself.
Prerequisites#
You need Node, a TypeScript project, and a database. The examples use SQLite so you can run them in a scratch folder. The docs show the same config with provider: 'postgres' for production.
You also need a way to receive HTTP requests. The examples assume you mounted the theAuth adapter at /api/theauth, which is the default mount path in the docs. Any framework works. Adapter setup is outside this guide.
One honest scoping note before we start. If your product only has individual users and no companies, none of this applies. Skip the whole stack and use plain sign-in.
Step 1: Install and create the instance#
npm install @glinr/theauthStart with only the organization module and grow from there. The org key is what creates theauth.org. Without it, that property is null, and every call in the next steps fails.
import { createTheAuth } from '@glinr/theauth';

export const theauth = await createTheAuth({
  database: { provider: 'sqlite', url: 'theauth.db' },
  org: {
    maxMembers: 100,
    maxOrgsPerUser: 5,
    allowCustomRoles: true,
  },
});
Those three numbers match the defaults in the docs: 100 members per org, 5 orgs per user, custom roles on. I set them in code to document the choice. Read the full option list on the Organizations page.
Step 2: Create an organization#
An organization is your tenant in practice. Slugs allow lowercase letters, numbers and single hyphens.
const org = await theauth.org!.create({
  name: 'Acme Corp',
  slug: 'acme-corp',
  ownerId: 'user_abc',
  metadata: { plan: 'pro' },
});

console.log(org.id); // org_...
The ownerId user becomes a member with the owner role automatically. That is one less write for you to forget.
I want to flag a naming trap here. theAuth also has a separate tenant module with theauth.tenant.create. It stores a tenant record, and agents can carry a tenantId. The Multi-tenant page is blunt about it: tenants are a data model, not an enforcement layer. authorize() does not compare tenants, and a suspended tenant does not block anything.
For human members of a SaaS product, I reach for organizations. I treat the tenant module as a label for agents, and I check agent.tenantId myself before acting.
Step 3: Invite members and assign roles#
Invitations expire after 7 days by default. You can change that with invitationExpiryMs, and cap invites per org per hour with maxInvitationsPerHour (default 50).
const invitation = await theauth.org!.invite({
  orgId: org.id,
  email: 'alice@acme.com',
  role: 'admin',
  invitedBy: 'user_abc',
});

// Later, in the accept-invite handler for the signed-in user:
const member = await theauth.org!.acceptInvitation(invitation.id, 'user_xyz');
Day-two management is three calls.
const members = await theauth.org!.getMembers(org.id);

await theauth.org!.updateMemberRole(org.id, 'user_xyz', 'member');

await theauth.org!.removeMember(org.id, 'user_xyz');
These methods take user ids as plain arguments, such as invitedBy. Your route handler must confirm that the caller may invite before it calls invite. Step 4 shows the check.
Step 4: Roles and permissions#
Four roles ship built in.
| Role | Permissions |
|---|---|
owner |
everything, including org:manage, org:delete, roles:manage |
admin |
members:invite, members:remove, agents:create, agents:revoke, agents:manage |
member |
agents:create, agents:manage |
viewer |
none |
The runtime check is one call. Here is the guard I put in front of the invite route.
export async function canInvite(orgId: string, userId: string): Promise<boolean> {
  return theauth.org!.hasPermission(orgId, userId, 'members:invite');
}
Your product will have domain permissions that the built-ins do not name. A billing role is the classic example. Create it per organization.
await theauth.org!.createRole(org.id, {
  name: 'billing',
  permissions: ['invoices:read', 'invoices:pay'],
});
Then call hasPermission(org.id, userId, 'invoices:pay') in your billing routes. Permission strings are yours to define. theAuth stores them and answers membership questions about them.
Set allowCustomRoles: false if you want every org locked to the four built-ins. I do that for products where support staff need to reason about every account by role name alone.
The HTTP route option#
You can also serve organization routes without writing handlers. The organization() plugin registers /auth/org/* routes for your adapter to serve, and every one of them requires an authenticated user.
import { organization } from '@glinr/theauth/auth';

const theauth = await createTheAuth({
  database: { provider: 'sqlite', url: 'theauth.db' },
  auth: { session: { secret: process.env.SESSION_SECRET! } },
  plugins: [organization({ maxMembers: 100, maxOrgsPerUser: 5, allowCustomRoles: true })],
});
The plugin does not add theauth.org to the instance. Pick one style per concern, or pass both org and the plugin if you want the programmatic API and the routes. The route table lives on the Organizations page.
A second route table on that page covers theauth.org.handleRequest. It serves more paths and does no authentication at all. Mount it only behind your own checks.
Step 5: Fine-grained access with ReBAC#
Roles answer "what can an admin do in this org". They cannot answer "can Alice open this one document because she edits its workspace". That question needs a graph.
theAuth ships a relationship-based engine for it. You register resources in a tree, then add relationship tuples between subjects and resources.
import { createReBACModule, createDatabase, createTables } from '@glinr/theauth';

const db = await createDatabase({ provider: 'sqlite', url: 'theauth.db' });
await createTables(db, 'sqlite');

const rebac = createReBACModule({}, db);

await rebac.createResource({ id: 'acme', type: 'org' });
await rebac.createResource({ id: 'eng', type: 'workspace', parentId: 'acme', parentType: 'org' });
await rebac.createResource({ id: 'api', type: 'project', parentId: 'eng', parentType: 'workspace' });
await rebac.createResource({ id: 'spec', type: 'document', parentId: 'api', parentType: 'project' });

await rebac.addRelationship({
  subjectType: 'user',
  subjectId: 'alice',
  relation: 'editor',
  objectType: 'workspace',
  objectId: 'eng',
});

const result = await rebac.check({
  subjectType: 'user',
  subjectId: 'alice',
  permission: 'viewer',
  objectType: 'document',
  objectId: 'spec',
});
// result.data.allowed === true
Two rules produce that true. An editor implies viewer. Also, workspace, project and document resources inherit from their parent, so the grant on eng reaches spec, two levels down.
Four details bit me or would have bitten me.
Resource ids are the primary key across all types. A document:spec and a project:spec cannot coexist, so prefix your ids with something unique.
Deleting a resource cascades to its children and to every relationship that names it. That is convenient and also a good reason to confirm before calling it.
The org type does not inherit from a parent. Types missing from the built-in table, such as doc, get no implied relations, so only an exact relation match grants access. Add your own rules with permissionRules for a wiki type.
Methods return a Result with success and data rather than throwing on expected failures such as PARENT_NOT_FOUND. Check success.
You can also list what a user reaches, which powers "shared with me" screens.
const projects = await rebac.listObjects({
  subjectType: 'user',
  subjectId: 'alice',
  permission: 'viewer',
  objectType: 'project',
});
// projects.data = ['api', 'web']
Where ReBAC does and does not connect#
Here is a limit worth knowing now. theauth.authorize() does not consult ReBAC. The docs describe the bridge: set relation on a permission and call theauth.policy.evaluate(), which runs the graph check for you.
const decision = await theauth.policy.evaluate({
  subject: { userId: 'usr_alice', orgId: org.id },
  action: 'read',
  resource: 'document:spec',
});

if (!decision.allowed) {
  throw new Error(`Denied: ${decision.reason}`);
}
The policy engine builds its own ReBAC module with the default rules. Your custom permissionRules are not used there. The resource must also be a concrete type:id, so a wildcard never matches a relation. Read the Policy engine page before you plan around this. For user subjects it also folds in org role permissions, scoped by the orgId you pass.
I also keep the cache in mind. The engine caches decisions per process for 60 seconds by default. After you revoke a relationship, call invalidate for that user, and accept that other processes catch up when their entries expire.
Step 6: Add SSO per organization#
Now the enterprise part. The sso key takes your provider definitions. SSO has no plugin form, and theauth.sso is null unless you pass the key.
export const theauth = await createTheAuth({
  database: { provider: 'sqlite', url: 'theauth.db' },
  org: { maxMembers: 100, maxOrgsPerUser: 5, allowCustomRoles: true },
  sso: {
    saml: [
      {
        id: 'okta',
        name: 'Okta',
        entryPoint: process.env.OKTA_SSO_URL!,
        issuer: process.env.APP_URL!,
        cert: process.env.OKTA_SAML_CERT!,
        callbackUrl: `${process.env.APP_URL}/api/theauth/auth/sso/saml/conn_id/acs`,
      },
    ],
    oidc: [
      {
        id: 'azure',
        name: 'Azure AD',
        issuer: process.env.AZURE_ISSUER!,
        clientId: process.env.AZURE_CLIENT_ID!,
        clientSecret: process.env.AZURE_CLIENT_SECRET!,
        callbackUrl: `${process.env.APP_URL}/api/theauth/auth/sso/oidc/conn_id/callback`,
        scopes: ['openid', 'profile', 'email'],
      },
    ],
  },
});
A provider definition is a template. A connection ties one provider to one organization and one email domain.
const connection = await theauth.sso!.createConnection({
  orgId: org.id,
  providerId: 'okta',
  type: 'saml',
  domain: 'acme.com',
});

// On the login page, after the user types an email:
const conn = await theauth.sso!.getConnectionByDomain('acme.com');
That getConnectionByDomain call is the heart of the "enter your work email" screen. If it returns a connection, you redirect to the IdP. If it returns nothing, you show the normal sign-in form.
The SAML flow#
// 1. Send the browser to the IdP
const authUrl = await theauth.sso!.getSamlAuthUrl(connection.id, '/dashboard');

// 2. Handle the POST the IdP sends to your ACS URL
const { user, orgId } = await theauth.sso!.handleSamlResponse(
  connection.id,
  samlResponseFromFormData,
);
The module verifies the response against the IdP certificate. The module rejects unsigned responses unless you set wantAuthnResponseSigned: false, and I would not. It does not support encrypted assertions, so ask the customer's IT admin for unencrypted ones. That request comes up in real onboarding calls, so put it in your setup doc.
Pass expectedRequestId as a third argument to bind the response to a request you started.
The OIDC flow#
const state = theauth.sso!.generateState();
const authUrl = await theauth.sso!.getOidcAuthUrl(connection.id, state);
// redirect the browser to authUrl

// In the callback route, after you validate the state:
const { user, orgId } = await theauth.sso!.handleOidcCallback(connection.id, codeFromQuery);
Discovery runs automatically from issuer/.well-known/openid-configuration, and the module verifies the id_token against the IdP's JWKS. It rejects an id_token without an email claim. Use validateState on the way back, and pass a nonce through both calls if you want replay protection.
The default rate limit is 10 attempts per connection per 60 seconds, tunable with rateLimitMax and rateLimitWindowSeconds. Failed logins return 401, or 429 when limited.
Step 7: Finish the login yourself#
Demos skip this step. It cost me the most time, and nobody warned me.
The SSO module does not create a user row. It does not add a membership. It does not issue a session. It hands you a verified identity, { user: { id, email, name? }, orgId }, and stops.
The user.id is deterministic: saml_ plus a SHA-256 hash of providerId:email for SAML, and oidc_ plus a hash of providerId:sub for OIDC. The same person always maps to the same ID. But that ID is not a row in your users table.
Your callback owns three jobs: find or create your user, ensure the org membership, and start a session. Here is the shape I use for the middle one. The findOrCreateUser and startSession helpers are yours, not theAuth's.
export async function completeSsoLogin(identity: {
  user: { id: string; email: string; name?: string };
  orgId: string;
}) {
  const localUser = await findOrCreateUser(identity.user.email, identity.user.name);

  const members = await theauth.org!.getMembers(identity.orgId);
  const isMember = members.some((m) => m.userId === localUser.id);

  if (!isMember) {
    await theauth.org!.addMember(identity.orgId, localUser.id, 'member');
  }

  return startSession(localUser.id);
}
Two notes on that code. addMember is on the module in the package source, though the docs page lists it only as an HTTP route, so confirm the signature in your installed version. And auto-joining everyone who authenticates through a connection is a policy choice. For a connection tied to acme.com it is usually right, because the IdP already vouched for the person.
Pass onAuditEvent in the sso config if you want login success and failure events delivered to your own logging.
Step 8: Add SCIM for provisioning#
SSO decides who can sign in. SCIM decides who exists. Without it, an employee who leaves the company keeps their account until someone remembers to clean up.
SCIM is a plugin from the auth entry point.
import { scim } from '@glinr/theauth/auth';

export const theauth = await createTheAuth({
  database: { provider: 'postgres', url: process.env.DATABASE_URL! },
  org: { maxMembers: 100, maxOrgsPerUser: 5, allowCustomRoles: true },
  plugins: [
    scim({
      bearerToken: process.env.SCIM_TOKEN!,
    }),
  ],
});
Then point the IdP's provisioning settings at your server.
Base URL:  <your app origin>/api/theauth/scim/v2
Auth:      Bearer token
Token:     <your SCIM_TOKEN>
Use a random secret of at least 32 bytes. The /api/theauth segment follows wherever you mounted the adapter.
The plugin exposes the standard SCIM 2.0 Users and Groups endpoints (list, get, create, replace, patch, delete). Users map to the theAuth users table. Groups map to organizations, which is why the earlier org work pays off here. Discovery lives at ServiceProviderConfig, Schemas and ResourceTypes.
The plugin also accepts autoCreateUsers and autoDeactivateUsers (both default true), plus onProvision(user) and onDeprovision(userId) callbacks. The callbacks are where I sync SCIM events into my own tables.
What the server supports#
Filtering covers the RFC 7644 grammar through the filter query parameter, with operators eq, ne, co, sw, ew, gt, ge, lt, le and pr. A request like this works.
GET /scim/v2/Users?filter=userName eq "john@example.com"A filter that does not parse returns 400 invalidFilter. The filter reference has the grammar, and the PATCH reference covers path expressions and the 1000-operation cap per request.
Not every SCIM feature ships. POST /scim/v2/Bulk returns a spec-compliant 501, and the config advertises bulk as unsupported. GET /scim/v2/Me returns 501 unless you pass a resolveSelf callback. IdPs that depend on bulk will need a different path.
The deprovisioning gap#
Read this part twice. A DELETE, or active: false in a PUT or PATCH, deactivates a user by setting the banned flag and a scim:deprovisioned metadata marker. That happens when autoDeactivateUsers is on.
theAuth's sign-in modules do not check the banned flag.
That means SCIM deprovisioning does nothing to a user's access until you add a check. Put it in your session start path.
export async function startSession(userId: string) {
  const user = await loadUser(userId); // your own query
  if (user.banned) {
    throw new Error('Account deactivated');
  }
  // ...issue the session
}
The Admin page covers the manual user-management tools that sit next to this. Do the same check in any long-lived session refresh too, or a deprovisioned user keeps working until the token expires.
Troubleshooting and gotchas#
Here are the failures I would expect in the first week, grouped by symptom.
The org property is null#
You did not pass the org config object, or you only registered the organization() plugin. The plugin serves HTTP routes and does not create the programmatic object. Pass the org key.
The sso property is null#
Same cause, different key. Add sso to the config. No plugin form exists.
SAML login fails with a signature error#
Check three things. Use the IdP signing certificate for cert. Make your IdP sign the response (disabling that check is a bad idea). Send assertions unencrypted, since the module does not support encrypted ones.
OIDC rejects a valid login#
The usual cause is a missing email claim in the id_token. Add the email scope and confirm the IdP releases the claim. The module rejects tokens without one.
Everyone is rate limited during a rollout#
The SSO default is 10 attempts per connection per 60 seconds. A whole office signing in at 9:00 can hit that. Raise rateLimitMax and watch the 429 rate.
A removed employee can still sign in#
Almost always the banned gap above. SCIM set the flag, and nothing read it. Add the check in your session start path and in session refresh.
SCIM returns 401#
The Authorization: Bearer value must match SCIM_TOKEN exactly. The docs describe a single static secret compared as-is, so no per-customer token exists. Every customer's IdP uses the same value. If one leaks, you rotate it and update all of them. That is a real operational cost, and a reason to think twice if you expect hundreds of SCIM customers.
Cross-tenant data shows up in a list#
This one is your code, not the library. Neither the tenant module nor the REST endpoints filter your own tables by organization. Every query you write needs an org_id predicate, and I would add a test that fails when one is missing.
When this is not the right fit#
I would not use this stack in three situations.
If you need hard, enforced tenant isolation from the library itself, with suspension that blocks access, theAuth does not ship that today. You would build it around the tenant and org modules.
If your enterprise buyers require SCIM Bulk operations, the server returns 501.
If you need per-tenant SCIM credentials, the single static token will not meet that.
None of these are dealbreakers for an early B2B product. They matter more once the contracts get large.
Go deeper#
The docs pages behind each step, in the order I would read them:
- Organizations for the full config reference and both route tables
- Multi-tenant isolation for the tenant data model and what it does not enforce
- Permission engine for agent permissions, constraints and templates
- Relationship-based access control for the resource tree and custom rules
- Policy engine for combining roles, relations and delegation in one call
- SSO for SAML and OIDC details
- SCIM for the provisioning endpoints
- SCIM filter reference and PATCH reference for IdP compatibility work
- Admin for manual user management
- Audit log for tracing what agents did
FAQ#
Should I use the tenant module or the organization module?#
Use organizations for human members, roles and SSO connections. The tenant module is a record that agents can reference, and the docs state it does not enforce isolation. Check agent.tenantId yourself if you use it.
Can one organization have more than one SSO connection?#
The docs show listConnections(orgId), which returns all connections for an org, and each connection has its own domain. Whether you can attach two connections to the same domain is not documented, so test that case before you promise it to a customer.
Does SCIM deprovisioning log users out?#
No. It sets a banned flag and a scim:deprovisioned marker. The sign-in modules do not read that flag, so you must check it in your own session code, including on refresh.
Do I need SAML if I already support OIDC?#
Often yes. Plenty of enterprise customers run Okta or Azure AD in SAML mode and will not switch for you. The sso config accepts both lists, and each connection has a type of saml or oidc.
Where do custom permission strings live?#
Custom roles store plain strings such as invoices:read on the organization. You check them with hasPermission. The policy engine splits role permissions on the last colon, so keep that format if you plan to use it.
Is ReBAC required for a B2B app?#
No. Roles cover a lot of products. Add ReBAC when you need per-resource sharing, such as documents or projects shared with a subset of an org.
Which part of your own B2B auth took the longest to get right, and would you automate it differently now?
Try it yourself#
The fastest way in is the quickstart. If this guide saved you time, a star on GitHub helps other developers find the project, and the docs cover every option used above. More about the project lives at theauth.dev.
Next: guide 4, migrating from Auth0 or Clerk. The full list sits in the table at the top of this page.
GDS K S · thegdsks.com · building Glincker · follow on X @thegdsks
Enterprise auth lives in the glue between modules, so read the gaps before you promise a customer anything.